
The Zazzle site is huge and there are so many different options so I thought I'd talk you through some of the real cool stuff you can do before you hit the 'add to cart' button.
Some people will follow links through blogs or other social media but for those that arrive at Zazzle from typing 'Zazzle' into Google - this is what you'll see.

This is the Zazzle home page and you can either scroll a bit further down this page to see featured (by Zazzle) products by category or you can type in a search term in the top right corner. The only thing to keep in mind here is that if you type in 'Obama' - you will get (at the time of writing) 2427 pages of results and I'll show you how to filter them further down but I think for this exercise, it's best to keep it simple and it doesn't get much more simple than Tony Abbott.
Now I should point out that it is no reflection on the Australian Prime Minister's popularity that there are only two pages of results because after all, Australia has a much smaller population than the United States. A better and fairer comparison is that the Obama designs are spread pretty evenly between positive and negative whereas not one of the Tony Abbott designs has anything nice to say about him.

This page shows all of the items on Zazzle which have been tagged with your search term (in this case 'Tony Abbott') and lets you filter your search results by product and price.
I chose 'clothing' and you can filter that further into men's, women's and kid's.
I scrolled down and went to the second page of results where I found and clicked on this design (it's one of mine)

Now this is where you can start having some fun. Directly under the colour choices is a 'see all styles' button. If you click there it will bring up this pop-up screen where you can change between mens and womens, fabrics, necklines.

For most designs there will be 126 different styles to choose from but bear in mind that some fabrics and styles are more expensive than other.
Zazzle also have little tabs that identify best sellers and out of stocks and when it comes to out of stocks - don't take their word for it. They sometimes use the out of stock tag if they are out of one colour so if there is a style you like open it up and check if the colour you want is in stock.
Ok, I've selected the men's value t-shirt but I've decided I want to make the design bigger or smaller (I haven't decided just yet) and that's when you click the 'customise it' button.

Clicking the 'customise it' button brings up a new screen which lets you change all sorts of things;
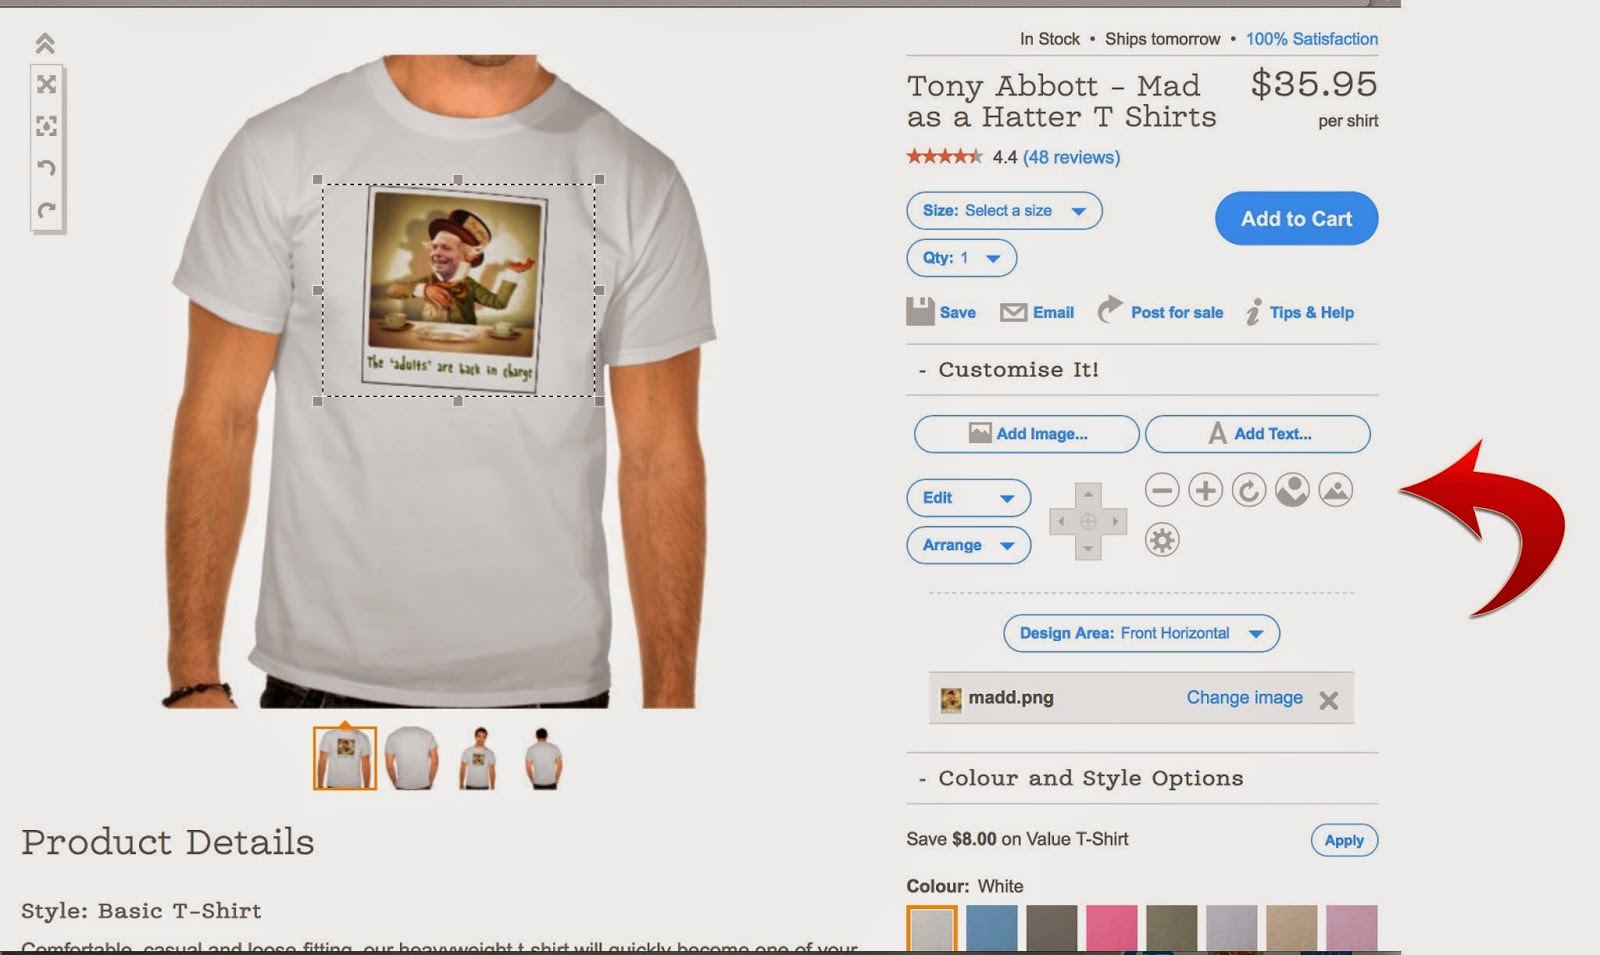
These buttons let you increase the size of the design and the orientation and you can also move the design off centre (within the print area)
Just above the size and orientation buttons is the 'Add Text' button which lets you add a personal message and below them is 'Design Area' button which lets you move the print to the back of the shirt.
Now it's pretty hard to stuff this up because Zazzle will let you know if the print is too big but if you want to see the printable area, click the button in image below

Clicking there will bring up another screen which shows you the 'bleed area' and this is important because if you place any part of the design in the bleed area, there's a good chance it will be cut off by the printer.
Putting aside the bleed area (it took me a while to work out that you have to click it again to go back to the main 'customise it' screen) the 'customise it' screen will let you change the background of the print by clicking on the 'Edit' button (below)

You will see a drop down menu that lets you choose a custom background colour and it's important to know that it doesn't change the design, just the background colour in the print area. I tend not to use this option very much on t-shirts but I do use it a lot on things like iPhone cases, linen and crockery but it doesn't hurt to have a bit of a play around.
Once you've finished customising you are directed back to this screen and it's fairly self explanatory what you do here but before you hit the 'Add To Cart' button, make sure you're happy with your changes (your finished product will look exactly like the image) and if not, go back and change it again because this is your last chance.

No comments:
Post a Comment